Tag: everyday cooking
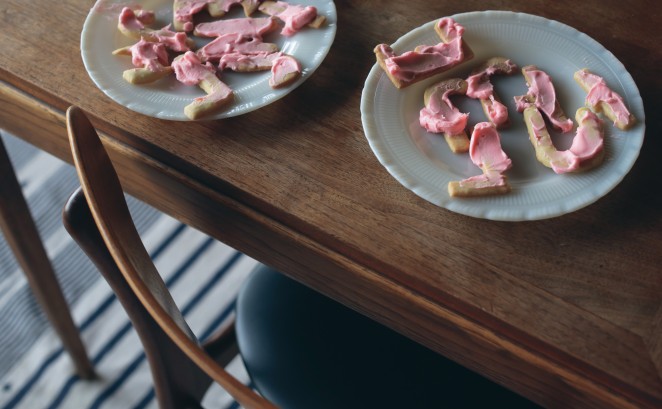
June 30
A couple of weeks ago, while researching rhubarb crumble recipes for the Crisps and Crumbles episode of Spilled Milk (still going strong, 52 weeks a year! and still featuring impromptu hair-metal duets!), I pulled down an old copy of Canal House Cooking, and it fell open to page 57, “Cutlets Smothered in Peas.” That’s when it dawned on me that I had somehow made it to age almost-39 without ever cooking a chicken cutlet, and that my child had somehow made it to age almost-five without ever eating a chicken cutlet. I understand this makes one subject to ridicule and rebuke not only in America, but also in many other parts of the world, including Japan, where panko-breaded, pan-fried chicken or pork cutlets (katsu) are, I hear – and hope to see for myself one day – a national staple.
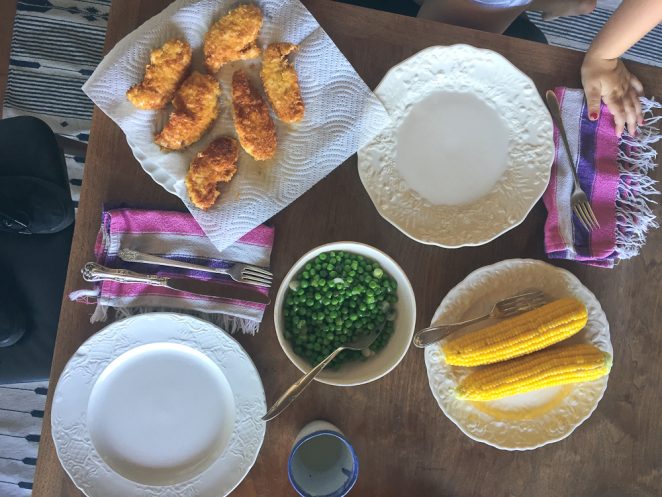
You probably already know how to cook chicken cutlets? I didn’t, and the Canal House recipe didn’t go into much detail, so I texted Matthew, who knows how to cook almost everything. The recipe below is quick and loose, a combination of Matthew’s instructions, some online recipe-reading, and Canal House’s smothered pea idea, banged out on my electric stove on a warm June night as an early dinner for two. (If you’re looking to do traditional katsu, which calls for pounding the meat to an even thinness and frying with greater exactness, Kenji Lopez-Alt has an excellent method.)
I recommend serving cutlets and peas with corn on the cob, cooked quickly in a skillet of simmering, well-salted water. In my experience, almost-five-year-olds are great at buttering corn on the cob. They can also participate in the chicken-dredging process, provided that your almost-five-year-old is a good hand-washer (and/or you are an exacting hand-washing supervisor). Almost-five-year-olds can also set the table. They may choose to do all of the above wearing only underwear and chipped nail polish. Upon taking a first bite, they may even exclaim, “I love this recipe!” Almost-five-year-olds are the greatest, except when they are not.
(A normal old recipe post! That was fun.)
Also:
- The aforementioned Matthew and I are teaching a two-day travel writing workshop at the Pantry on July 15th and 16th. Please join us. The description reads thus: The best travel writing brings you all of the discovery, disasters, and deliciousness of travel with none of the flight delays. But how do you write about a place without sounding like a Chamber of Commerce brochure? In this two-day workshop, bestselling authors Molly Wizenberg and Matthew Amster-Burton will show you how to find the story in a destination, zoom in on meaningful details, and understand right and wrong ways to put yourself into the story. To get you there, we’ll explore selections from writers like Fuchsia Dunlop, Ann Patchett, Rachel Khong, Bill Bryson, and more. Sign up via The Pantry.
- I’m reading Sherman Alexie’s new memoir, and it’s difficult and funny and immensely good. I loved his recent interview with Terry Gross on NPR’s Fresh Air.
- I wish Rookie had existed when I was a teenager. Of course, that doesn’t stop me from reading it now, and I’ve listened to every episode of the Rookie podcast. Tavi’s recent interview with writer and transgender activist Janet Mock was especially inspired. And don’t miss Roxane Gay on bodies, writing, and more.
Hi. We’re well, and I hope you are too.
Chicken Cutlets Smothered in Peas
Inspired by Canal House Cooking, Vol. 6: The Grocery Store
June didn’t like the scallion flavor in the peas, so next time, I’ll be leaving the scallions out. I like it either way.
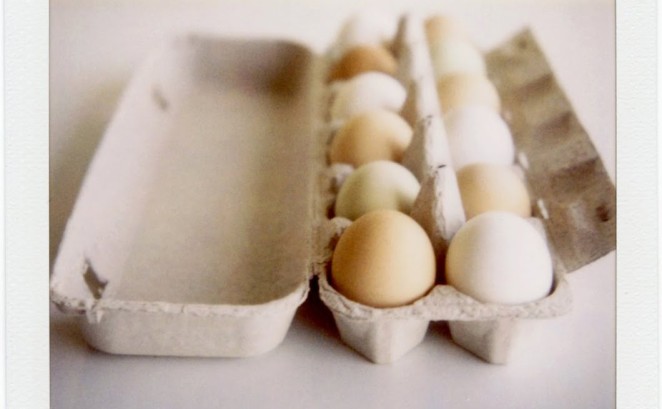
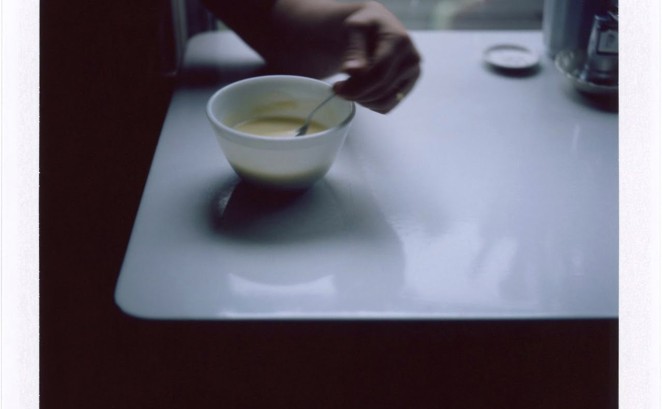
Set out three shallow bowls. Put a large, heaping spoonful of flour in the first, the egg in the second, and a large, heaping spoonful of panko in the third. I didn’t measure the flour or panko, and I think you can safely eyeball it. Beat the egg well with a fork.
Season the cutlets with kosher salt.
Working with one cutlet at a time, dredge in flour with one hand, shaking off excess. Transfer to the egg dish, turning the cutlet with your other hand to coat both sides. Lift, allowing excess egg to drain off. Transfer to the panko bowl. With your first hand, scoop panko on top of the cutlet and gently press to adhere, taking care that the whole thing is coated. Transfer to a clean plate. Repeat with remaining cutlets. If this is done properly, your first hand should touch only dry ingredients, while your second hand should touch only wet, and ideally it’s not too messy. If it is, oh well.
Pour oil into a 10-inch skillet to a depth of ¼ to 1/3 inch. Place over medium-high heat. When the oil shimmers and runs loosely around the pan when you tilt it (around 350°F), gently lower the cutlets into the pan, laying them down away from you to prevent splashes of hot fat. Don’t crowd the pan; cook in batches if necessary. Cook cutlets until the bottom side is set, and then flip and fry until the second side is set. Continue cooking, flipping occasionally for even browning, until the cutlets are golden brown – fried-chicken color – and cooked through, about 4 to 5 minutes per side. I use a Thermapen to test for doneness, pulling cutlets from the pan around 155°F. They will rise to 165°F (the USDA safe temperature) as they rest. Transfer to a plate lined with a paper towel.
Meanwhile, melt the butter in a saucepan over medium heat. Add the peas and scallions and a generous dash of salt, stir to coat, cover, and cook until tender. I didn’t time this. Maybe 10 minutes?
Serve everything hot, the buttery peas spooned over the cutlets.
Yield: 2 to 3 servings
April 30

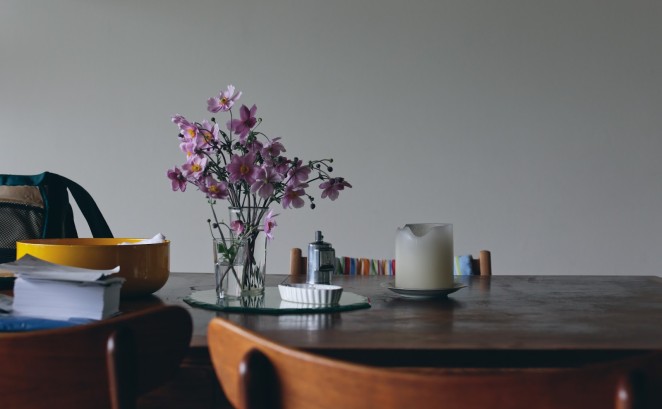
I got Junie into bed on time tonight, the first night in a week, and to celebrate, I’m sitting at the table, listening to the birds outside, thrilling at the fact that it’s 8:24 pm and I haven’t yet flipped on a single light switch. And because it feels like time is on my side (yes it is, la la la, though probably just for tonight), I wanted to pop in the door and say a small something. Hello. I don’t feel very interested in writing about food. It has felt jarring and incongruous to write about food and cooking these past months, like I’d be doing that old Wizard of Oz number, pulling levers and pushing buttons, yelling Pay no attention to that…
Read moreOctober 3
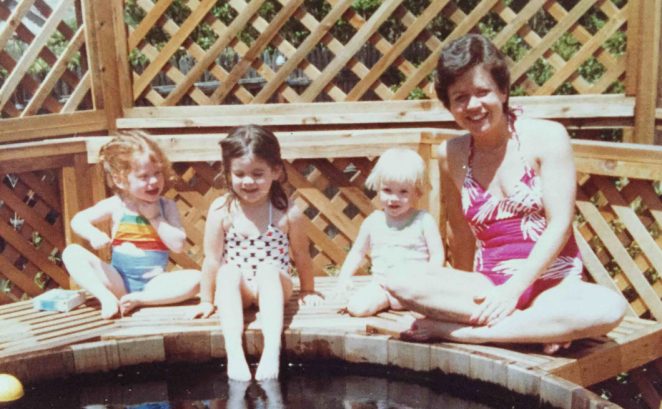
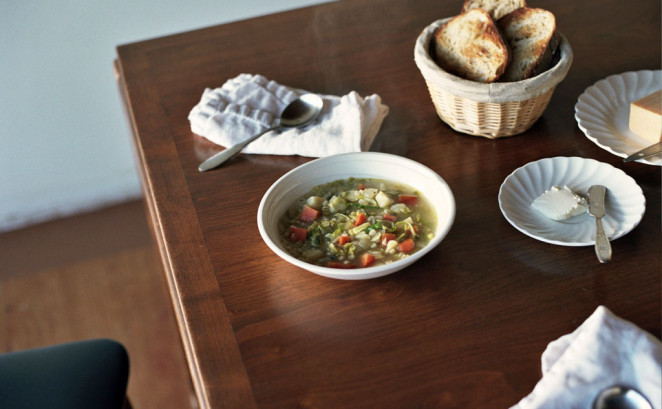
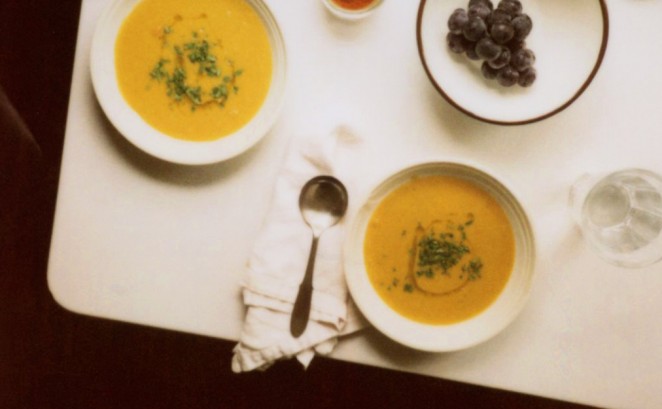
I started my Monday by listening to Blood Orange until my ears fell off, which was nice. Then my friend Jenny told me to watch this (old-news) video (that I somehow had never seen before), and with that, my week is off and running. Hi to you. Now, business: 1. The Guardian kindly invited me to write about a food that evokes home, and I wrote about a dead-simple, bare-cupboard soup that was first made for me by my aunt Tina. That’s her below, on the right, living the early-eighties hot tub life with me and my cousins. Most people thinks that June gets her hair color and texture from Brandon, but world, let it be known that I think she’s got my texture…
Read moreIt doesn’t look like much
Helloooooooooooooooo. I didn’t mean to be gone for so long. I know what some of you were thinking, and I am delighted to report that I did not give up on blogging. I also did not die. But it’s been a long, hard, dizzying summer, I will say that, with, among other things, Herculean staffing woes at Delancey, Essex, and Dino’s. (Did you know there’s currently a shortage of restaurant cooks in a lot of cities, including Seattle? I could tell you stories.) But now that June is in school again, I’ve been able to tiptoe my way back to writing, and that’s a relief. I turned 38 last week, and that too feels good. I’ve also been cooking again, after the lazy, happy ease…
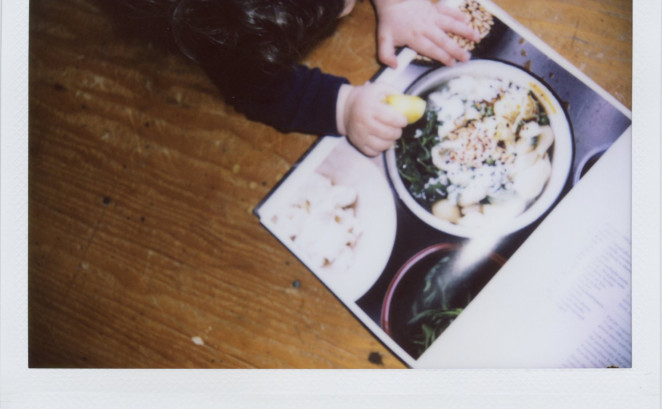
Read moreCooking with a young child
Today, on the ole blog: some thoughts about cooking with a kid! After the jump! Because I totally get that not everyone wants to read about kid stuff! See you next time!
Read moreThat January thing
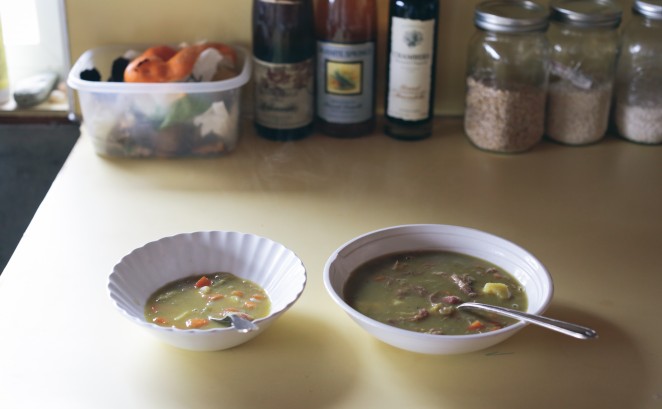
Split pea, the ugliest soup! The food whose appearance most closely approximates toxic waste water! The miraculous substance capable of making a home kitchen feel like a military chow hall! Capable of making a person who has never used the words “chow hall” in her entire life suddenly feel like Chow Hall is what she will call her vast, sweeping estate in the English countryside, when she somehow inherits a vast, sweeping estate in the English countryside! Split pea, a voyage for the mind! I have written before about split pea soup. It is apparently a January thing for me: I last wrote about it four years ago this month. Until yesterday, in fact, I wasn’t going to write about this particular version,…
Read moreThe bean doctor
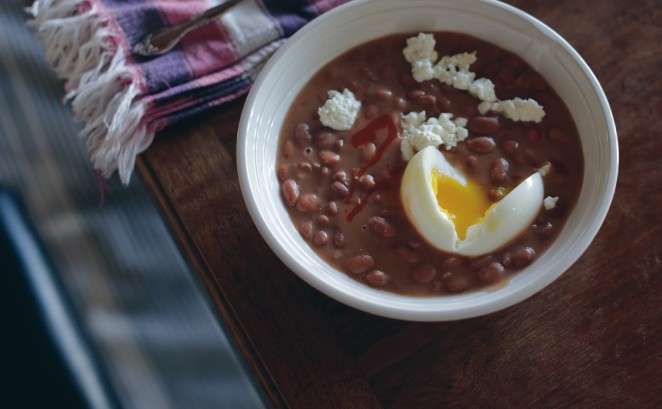
I believe everyone should know how to doctor a can of beans. I also believe that, having said this, I have become my father. I also believe I would do anything, anything, absolutely anything to get R. Kelly’s “I Believe I Can Fly,” which lodged itself in my head as I was typing those first two sentences, back out of my head again. Spread my wings and fly awaaaaaaaaaay I come from a family of bean doctors. The beans we ate most often were baked beans – Bush’s brand, I think – to which my dad added brown sugar and Worchestershire sauce. We ate them whenever my mom was out for the evening, usually with boiled hot dogs. It felt…
Read moreEven on a good day
My mother has been in town since early this month. We don’t often get this kind of extended time in the same place, and I’d forgotten what a good cooking collaborator she is. She makes sure our wine glasses are never empty. She cleans up as she goes. She doesn’t mind deveining shrimp! I could go on and on. I bow down. At my reading in Madison last week, someone asked me to talk about a few of my favorite cookbooks. The ones I mentioned were The Zuni Cafe Cookbook, All About Braising, various Nigel Slater titles, and Every Grain of Rice, and because I am long-winded, my answer wrapped up, blah dee blah blah, about twenty-five minutes later, on the topic of…
Read moreCall it a meal
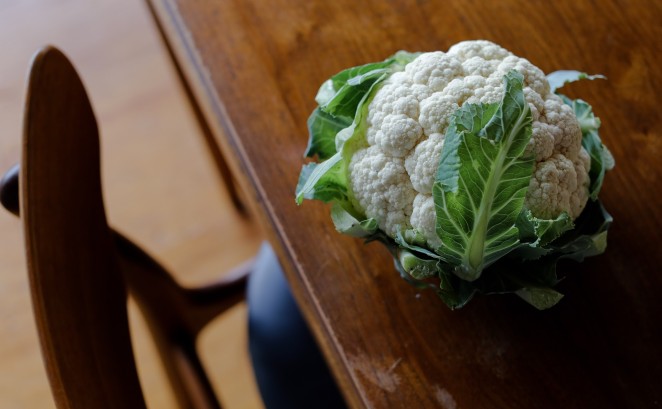
We have reached the point in winter, or spring, or whatever it is, when even I am tired of making, eating, and talking about soup. I’ve been meaning to make a batch of vegetable and pearl barley soup for the past week, and I even forced myself to chop up everything the other night before bed, thinking it would inspire me to get on it the next morning, but, eh. Eh. I’d rather do what I did twice last week: throw a cauliflower in the oven, eat the whole pan, and call it a meal. Roasted cauliflower! Old news! You know how to roast cauliflower. I know how to roast cauliflower. But here I am, talking up roasted cauliflower, because this particular…
Read moreA short leap
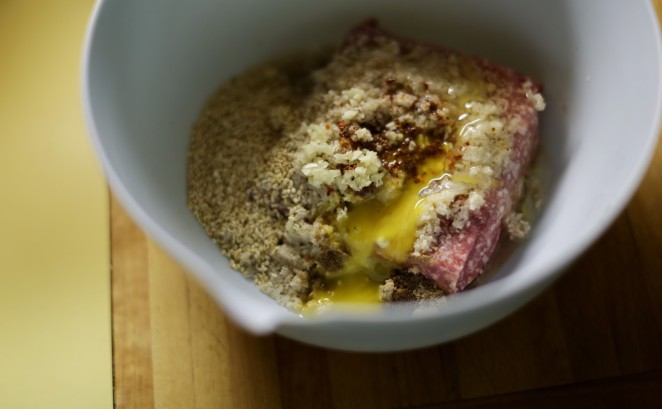
Our friend Ben is in town for a visit, and this past Friday, while we waited in line for lunch at Il Corvo – always worth the wait, in case you ever walked by and wondered – I told him about some lamb meatballs that I wanted to write up, but that I had a problem: the only photo I have is of the raw meat and seasonings in a bowl. Ooh, Ben said sharply, sucking air between his teeth, which I took to mean, That’s going to hurt. And yet. AND YET. Maybe it will ease the blow to know that the reason why I have no meatball photo is that, by the time they’re done cooking, they smell so…
Read moreThe right buttons
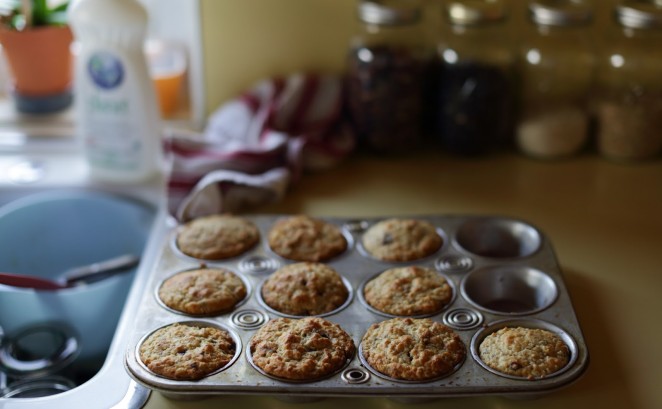
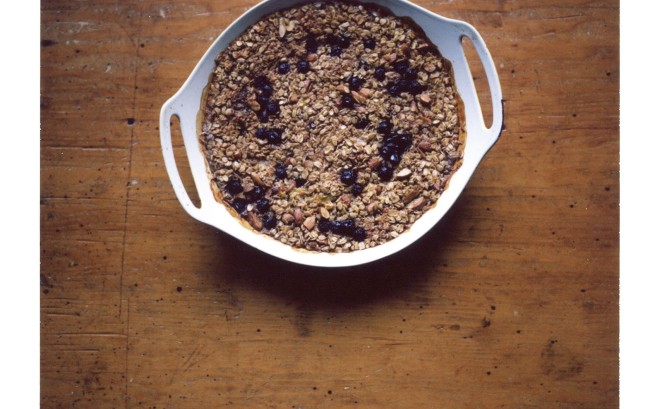
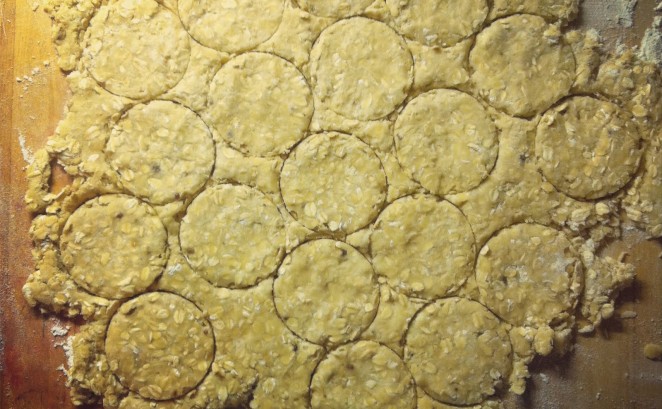
Before we get started: thank you for your comments on my previous post, and for sharing so many good tips and ideas about feeding families. May I say that you all seem like great parents? You seem so sane. (Sanity! Sometimes I think it’s the highest goal.) I’m going to get unbecomingly sappy for a minute and say, yet again, how happy I am to have this space, this community of sorts. I know I’ve said it before, but I think about it even more often than I say it. I also think about leftover oatmeal muffins. I think about leftover oatmeal muffins even more often than I think about oatmeal, which is inconvenient, because you obviously have to have oatmeal…
Read morePlease consider
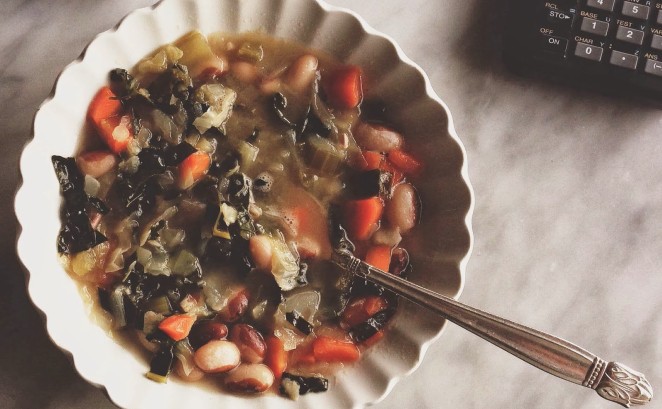
So, how bored will you be if we talk about soup again? Ham Bone, Greens, and Bean Soup? I didn’t set out to write about this one – I made it mostly as a vehicle for a ham bone that I put in our freezer last April, forgot, and then triumphantly unearthed the week before last – but June liked it so much that she did her special high chair “dance,” swaying from side to side and grunting, so I changed my mind. Swaying and grunting: strong praise from young June E. A. Pettit! (Also, Swaying and Grunting: what I will call my debut album when I launch my third career as a down-and-out country singer.) I know that it’s almost…
Read moreOver and over and over
It was a summer of greatest hits. I’ve always been a redundant cook, content to repeat a couple dozen recipes over and over (and over and over and over), recipes that I know as though they were wired into me, the way I know my name, the alphabet, and lyrics to songs that haven’t seen radio play since Bill Clinton was president. (Wheeeeee…) This summer, I really let myself run wild in that department, which is to say that I have done nothing even vaguely wild, and it has been great. I’ve made meatballs three times now, my best meatballs, which are Cafe Lago’s recipe cooked in Marcella Sauce. There was a batch of Lago’s pomodori al forno, too, using…
Read moreA new reason
I just sat down, looked at the calendar, and noticed that it’s August 9th. June is eleven months old today. On Monday, Delancey will be four years old, and on Thursday, Essex will be one. Is this what happens when you become a firm-and-fast adult? You’ve done enough stuff and crossed paths with enough people that at some point, each day comes with a birthday or anniversary? I mean, in addition to bills and tax deadlines and increasingly tight hamstrings? In other words: there’s always a new reason to eat cake, isn’t there? Or drink wine? Both? I have a very cold bottle of riesling in the refrigerator. But there is no cake here, and that is because there is no…
Read moreTold you so
Every so often, I encounter a recipe that makes me want to forgo the usual niceties of a post – the introduction, the story, the conclusion, the delicate foreplay – because that would only slow you down, when what you should really do is grab your shoes and make a list and run to the grocery store and throw some money at the cashier and run back home and make this immediately and I mean it, go, right now, DO IT. One such recipe is Conchiglie with Yogurt, Peas, and Chile, from the stunning book Jerusalem, by Yotam Ottolenghi and Sami Tamimi. Even June is all over it. The only problem is that I made it for a late dinner a few nights ago, when…
Read moreWe have a rhythm
June is six months old. She has two teeth, monstrous thighs, and is my favorite person in the world. Totally predictable, I know, but I really never thought I would say that about someone who spends most of the day drooling and pulling my hair. Sometimes she looks at me tenderly, places a dimpled hand on either side of my face, and then lunges forward, giggling, and savagely bites my nose. She suits me so well. Really, she’s perfect for me. We have a rhythm. I sent my revised manuscript to my editor in the final days of February. A few days later, we lost our manager at Delancey and Essex. Though losing a staff member always makes me and Brandon…
Read moreThe usual
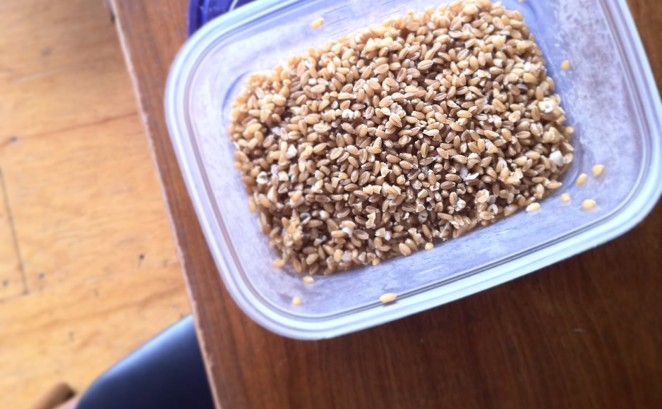
In the time since we last spoke, I’ve revised the manuscript for my next book! I’ve traveled alone with my five-month-old baby to a family wedding on the other side of the country! I’ve felt like an Olympic gold medalist for having survived traveling alone with my five-month-old baby to a family wedding on the other side of the country! I’ve consumed biscuits and dark chocolate milkshakes and fingers and cheeks, listened to Fugazi and almost remembered what it felt like to be 15 and have a crush on Guy Picciotto, tried two recipes for healthy cookies, decided that I’m not into healthy cookies, made my daughter wear a pair of sunglasses that were intended for a doll, and rekindled my love for farro. The usual. I…
Read moreA small revolution
You good, good people. Before I say another word, I want to thank you for your many comments, your e-mails, and the incredibly kind card – a real, three-dimensional paper card – that one of you sent to me at Delancey. Your kindness blew me away. I thought for a long time before deciding to write that last post, and I want to thank you for making me feel not only safe in deciding to do it, but very, very glad. I remember my doctor saying to me, one day in mid-December, that I would not only recover, but that someday soon, I might even have a hard time remembering exactly what postpartum depression felt like. Though he’s been my…
Read moreIt’s my specialty
Hi. I am writing this from my in-laws’ kitchen. Brandon is out on a bike ride with his dad. THEY’RE BOTH WEARING SPANDEX!!!! It’s a great day to be in New Jersey. Before the holiday sets in, while it’s still relatively quiet in the house, I wanted to share a recipe with you. I should say first that it’s not for Thanksgiving. I know you already have plenty of that. What we have here is something for this weekend, or next week. More specifically, what we have here is the soup that I will be eating over and over and over again, lunch after lunch and dinner after dinner, for months to come. The New Winter Favorite. I can tell…
Read moreYour efforts will be rewarded
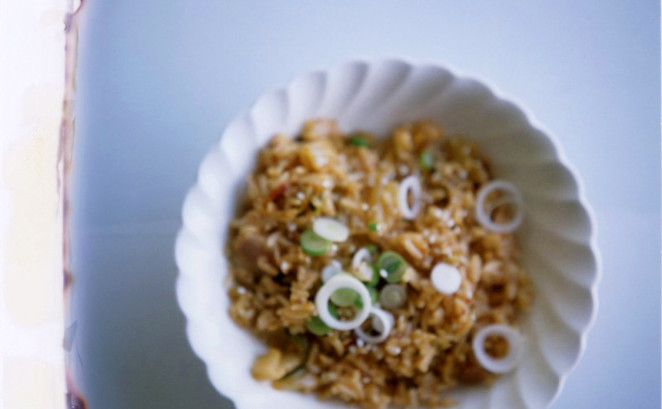
Listen, I know it’s a holiday weekend. Most of you are probably outside, grilling or picnicking or generally engaged in some form of early-summer eating. In fact, as I type this, I can hear my neighbors on their deck, shaking a bag of charcoal briquettes, talking about Neil Diamond. But what I would like to tell them (aside from, HAVE MERCY! NO NEIL DIAMOND TONIGHT!), and you, too, is this: do your future self a favor and go inside and cook a pot of rice. Also, do whatever you have to do to get some Napa cabbage kimchi. Come midweek, your efforts will be rewarded. I can’t believe it’s taken me this long to get around to writing about kimchi…
Read morePile it on
Let’s get it out of the way right now: this egg salad, the one we’re going to talk about today, is not a beautiful egg salad. There will be no sexy pictures of this egg salad. There will not even be vaguely winsome pictures of this egg salad. There will be no pictures at all of this egg salad. But it has other things going for it, like the way it tastes, and if push comes to shove, you can always eat it in the dark. A couple of weeks ago, I got an e-mail from a new friend, telling me about this egg salad. She’d found the recipe in the April issue of Saveur, the sandwich issue, where it…
Read moreEasy enough
We moved last Tuesday. I’m going to repeat that, because it sounds so unlikely, so inadvisable, that I know you might not believe me. I hardly believe me. But we did. We moved. Brandon is starting a second business, and I’m trying to start a second book, so, you know, la la la, let’s move. We’ve had worse ideas, but I can’t think of them right now. This is the last picture taken in our old kitchen. Our old kitchen, our old place, our old duplex, where we lived for almost five years, on a noisy street with the nocturnal neighbor who does outdoor home improvement projects by flashlight. I will miss that place, but only a little, and never…
Read moreThey wake me up

Lately we’ve had a lot of friends passing through, lots of changes of sheets on the guest bed. Sam has been around a bit. Ben, our friend who moved here a couple of years ago but was quickly wooed away by work, is doing a short-term gig nearby and comes around on his days off. And Ryan, who also lived here briefly and was wooed away, is flying in tonight for a visit. The bourbon in the bottle is two fingers lower than it was last week, and the apartment feels nice, lived-in. Most days, days when we don’t have house guests, I spend long stretches of time alone, working. I like the quiet. I don’t need a lot of…
Read moreShe got out a skillet
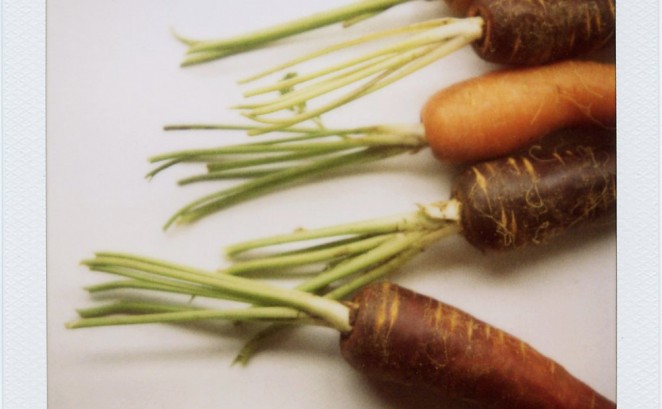
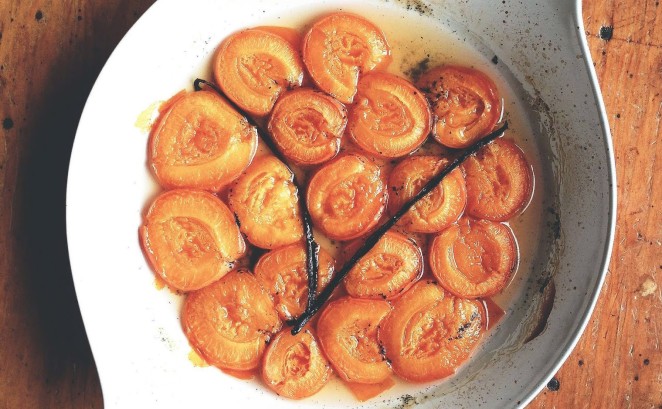
I should begin with a confession: I’m not in Thanksgiving mode yet. Who knows. It’s weird. This holiday sort of sneaks up, I’ve noticed, and then it’s quickly eclipsed by Christmas, which is sad, since Thanksgiving is our only national holiday devoted wholly to eating. This year, we’re heading to New Jersey to visit family, and I will almost certainly make cranberry chutney and probably a chocolate pecan pie, but it’s been hard to plan from a distance. Thanksgiving of 2010, I apologize. I’ll do better next year. On the upside, I ate almost two pounds of carrots today. I’m not sure why, but I keep thinking about my host mother. I haven’t seen her for ten years, but still,…
Read moreI am sold
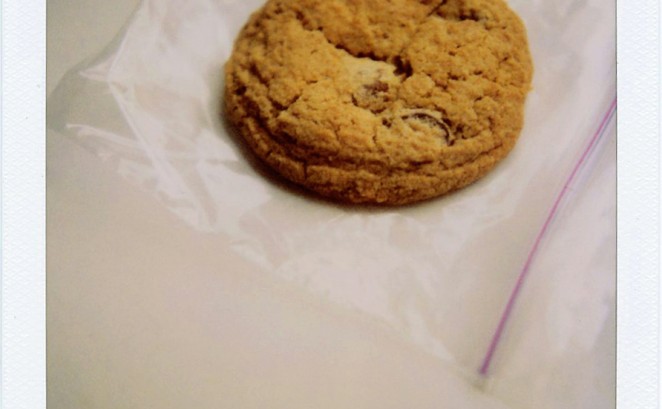
I know this cookie looks wholesome. Actually, I’ll raise you one and say that it verges on homely. But this cookie speaks to me, and what it says is, Hey, baaaabe-eh. In this voice. Meet Kim Boyce’s whole wheat chocolate chip cookie. This might be my favorite chocolate chip cookie, which is an absolutely insane thing to say, because until about a week ago, I thought that title belonged, forever and ever, to the New York Times chocolate chip cookie. I don’t know what I think anymore. Let’s just call this my new favorite chocolate chip cookie and leave it at that.I first heard about this recipe from Luisa, and then Lecia mentioned it to me, too, and maybe Brian,…
Read moreBecause there was a bag of plums
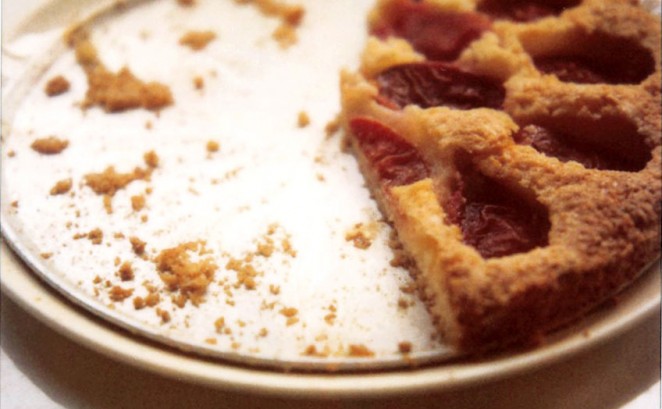
I took this picture on an excellent afternoon. It was a Saturday. I had just met a deadline that I had been dreading. I was immensely relieved. Two of our best friends were in town for a visit, two friends who moved here a couple of years ago and became sort of like family, but then they found jobs and gigs in other cities, so they moved away. But they were in town on this particular day, and we had stayed up late the night before, and the night before that, and now it was late afternoon. Bonnie had a concert, and Ben was driving her to rehearsal, and Brandon was at the restaurant, and I was home alone. Because…
Read moreA quiet soup
That was not the week I planned to have. Whoa. A week ago yesterday, I went to bed like I do every night. I read “Shouts & Murmurs” in the New Yorker and wondered, as usual, why it wasn’t very funny. I set my glasses on top of the stack of books on my bedside table and then retrieved them when they fell, as usual, and slid behind the table. I felt pretty normal – which is to say, I didn’t feel abnormal. Until I woke up at 3:30 in the morning, feeling nauseous, and spent the next four days on the couch, trying to get down a glass of Gatorade. You know you’re very sick when even a nature…
Read moreBefore you know it
Somewhere, a woman named Corentine is serving leeks vinaigrette for dinner. It’s been ten years, but I know it. Corentine was my host mother in Paris, the year that I was 21 and studying abroad. She had the most magnificent name I had ever heard and something a little Jane Birkin, just a little, about her looks. Whenever someone asks me how I learned to cook or how I got into food, I usually credit my parents, but I should also credit Corentine. She and I didn’t have a lot in common, but food was enough, and we seized it. I ate at her table for six months, and she taught me what she thought I should know. She taught…
Read moreWhat this summer felt like
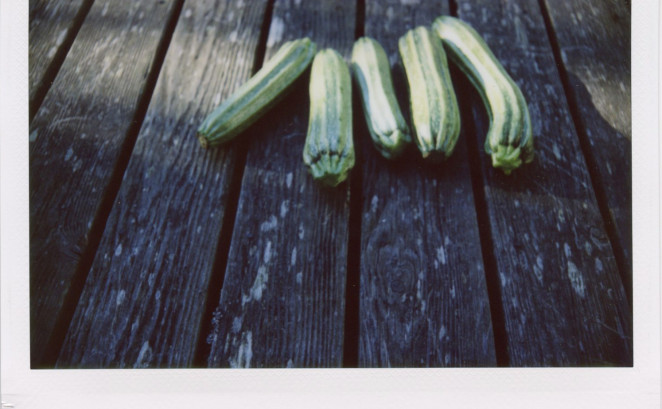
Labor Day sneaked up on us. We fell asleep last night with the windows open, and this morning, there was a chill in the house. I know I’m not supposed to say it, but I think something is changing. When I think about this summer, these are the pictures I want to think about. They’re what this summer felt like. I’ve taken a lot of ferry rides. I’ve eaten a lot of melon. I’ve eaten a lot of strawberries. I’ve eaten fried chicken and lemon icebox cake and zucchini. I’ve been eaten by a lot of mosquitos. I’m ready. Happy Labor Day.
Read morePeas without apology
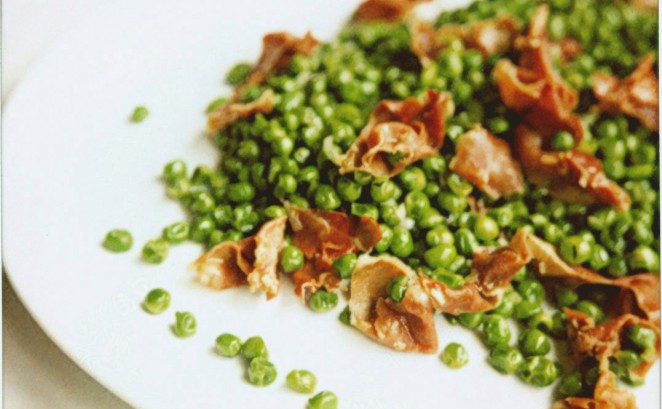
Last weekend, over the course of 24 hours, I ate almost a pound of peas. I’ve done crazier things in my life, but not many. I would like to tell you that I bought my peas at the farmers’ market, and that I shucked each one by hand, and that it was a true, starry-eyed labor of love, pod after pod after pod after pod, because it’s spring, and people are supposed to eat fresh peas in spring. But I haven’t seen any peas at our market, and I didn’t feel like waiting, so I bought a one-pound bag in the freezer aisle at the grocery store. I totally cheated, and I am not sorry. I needed some peas. Maybe…
Read more